By Greg Duly
Semi-auto shotgun maintenance is often overlooked by hunters - Photo Credit Hamish Carnachan
Cleaning is something a lot of shotgunners don’t even think about until their semi-auto starts malfunctioning, and of course Murphy ensures this is always when the ducks are flying!
Don’t pick up your shotgun for the first time of the year on Opening morning or you’re gunning for a case of semi-auto rage for sure.
Because accuracy isn’t an issue with a shotgun, the reason we clean them is to keep them in good condition without corrosion, and minimalise malfunctions. This is especially important as gas operating semi-autos have become the most popular waterfowling shotgun by a mile - due to their recoil reducing capabilities with the generally heavier recoiling non-toxic ammunition.
GAS OPERATING SYSTEMS
Let’s just state one thing right here, all semi’s malfunction sooner or later in the real world of hunting, no matter what any salesman may tell you. Appropriate maintenance on a semi is designed to keep this to a minimum, and some require more of it than others.
Let’s start with the type with the greatest cleaning requirement – the gas operated semi. Most of them have a self-cleaning gas system, utilizing a spring loaded ring like a combustion engine’s piston rings. This seals the gas cylinder/system so the gas pressure creates a rearward thrust on the piston, and it also scrapes off excessive carbon build up that occurs inside the gas cylinder.
This part of the mechanism requires only a very occasional clean after 1000s of rounds when the build-up is inhibiting the operation. Soak it in a specific carbon solvent like Carbon Killer, M-Pro7, KG1 or Boretech C4, followed by a scrubbing with a toothbrush or little wire brush or similar to remove the hardest carbon deposits.
A final blast with compressed air is the best way to finish the job. It is behind the gas cylinder that the trouble usually starts, with the linkage that delivers the rearward thrust to the bolt body. Some have a system of floating collars and O rings, while with others the piston pushes directly onto the collar around the magazine tube attached to the operating rods which are attached to the bolt.
With the Beretta 390 and its offspring, the gas cylinder and piston sit in front of the mag tube, with no compromise to function to fit around it, and this is why the 390 has one of the lowest maintenance gas systems. You do end up with a very long forend for only a three-round magazine.
With most others like the first Xtremas and later model A400s, the piston and cylinder work around the mag tube to allow a longer magazine tube and therefore a larger magazine capacity, but you do end up with residue issues between the mag tube and piston etc at times, especially when everything gets wet.
When you mix powder residues and a little weather-borne silt and water, you can get a sludging up and slowing down of the cycling we call ‘porridging’. The rule with gas systems is keep them dry, as oil only attracts and creates residue build ups. Clean the outside of the mag tube and the inside of anything that slides around it, but don’t oil it.
The other gas system you may encounter is the Remington Versamax type, with its small diameter twin gas cylinders and pistons either side of the chamber. Treat these two cylinders the same as any gas system, but you don’t have any sliding linkages between the pistons and the bolt to worry about, hence there is less mechanism to porridge.
Behind the gas system you need to keep a look out for anywhere there is close tolerances between the moving parts and the receiver, and a classic example of this is with the Xtremas and A400s. The twin operating rods linking the bolt and collar behind the piston run in grooves in the receiver. These grooves accumulate crud over time, increasing friction if dry and hindering the bolts operation.
If this crud then gets wet, this again acts like porridge slowing the whole cycle down and causing malfunctions. This is the only area of the Xtrema and A400s that needs oil. You can either just keep lubricating it with a high-quality CLP (Clean Lubricate Protect), or you can dissemble the action and clean those grooves with solvent and an old toothbrush then reassemble with lubricant.
You should also occasionally lubricate the moving parts in the bolt assembly to minimalise wear. Don’t go too crazy with oil here as you’ll get a fair bit of powder residue coming back out of the chamber and this will build up in the oil layer, which will dry out over time. Then add water, especially with the grit from a big blow on one of our large shallow wetlands and you’ve got the perfect porridge recipe again.
Sometimes just keeping up the lubrication will see you through the day, but you’ll need to strip it, clean it, and lightly lube the close tolerance moving parts behind the gas system before going out again.
INERTIA OR RECOIL OPERATING SYSTEMS
The classic example here is the Benelli and its clones, and with no gas system there is little to maintain. They will still accumulate powder residue out of the chamber into the action as above, so you need to clean this occasionally if you’re going to be operating in the wet and windblown silt or they will also porridge. Afterwards you only need to lightly lube the bolt assembly and that’s about it.
The older short and long recoil systems on the Browning A5’s and Bredas etc need some additional lubrication. You must also keep the mag tube, and the return spring and friction rings around it well lubed in this case. You also can’t afford a rough and rusty chamber, which causes extraction problems on older barrels without chromed bores.

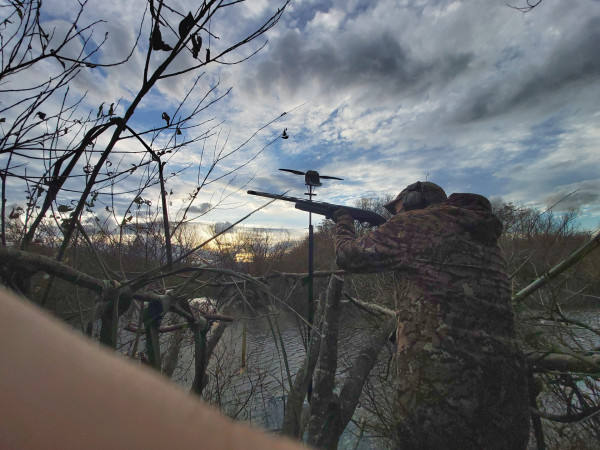
Look after your semi-auto to prevent malfunctions at the wrong time - when the ducks are coming in - Photo Credit Hamish Carnachan
RETURN SPRINGS
In a lot of guns, like all the Benelli’s, these are hidden in a tube in the butt, which being out of sight and mind allows a problem to sneak up on you. Many times I’ve seen waterfowler’s butts immersed under water and this means corrosion is on the way, sooner or later.
Always dribble a little CLP down around the plunger that the linkage off the back of the bolt sits into. The return spring is behind this plunger. Periodically dissemble the butt and return spring tube, and clean and relube before reassembling. There are aftermarket stainless return springs available for some models and these would be great peace of mind.
The models with the return spring around the mag tube like the Xtremas and A400s are the most fool proof and never give trouble.
TRIGGER MECHANISMS
Compressed air is the best fix for these, just to remove the odd large burnt or unburnt powder grain that can occasionally get stuck somewhere and stop something working. Safety catches are a classic for this, crud doesn’t often get in there, but when it does, it nearly always creates a problem due to the close tolerances.
BORES AND CHOKES
Modern chrome-lined bores require little cleaning; I only clean mine if I’ve been out in the rain before putting them away. I squirt some CRC or WD40 down the barrel from the chamber, leave it to soak muzzle down for a bit, then push through a patch of 4 folded sections of loo paper on a jag. This nearly always removes all fouling and leaves a thin film of oil. Bore-wise that’s all I do!
Normally this also allows some penetrant to get in around the choke’s thread to stop it rusting in place. You should remove and lightly lube your chokes periodically anyway. Also be aware steel shot hammering through your choke can cause it to loosen over time, so always lube your thread and do your choke up tight with the proper tool when installing it – not just hand tight – and check it periodically during a day’s shooting.
Continuing to shoot steel through a choke that’s come loose can destroy your thread, swage up the choke diameter and seize it in the barrel, or even blow the choke right out of the muzzle. Chokes are definitely something that now need more attention than the old lead shot days.
If your gun has a blued exterior, you’ll need to keep the rust off that with a thin film of one of the rust preventatives, and maybe a little oil on a Scotchbrite pad or fine steel wool on any rust spots before they pit too deeply.
So, there you have it, the A to Z of simple semi-auto maintenance. If you follow this easy system in future, hopefully you won’t be reduced to a single shot next time the shooting is fast and furious! There’s only one thing worse than watching someone with a case of ‘Semi-Auto Rage’, and that is experiencing it yourself.