Back to Fishing Knowledge Hub
Fishing from boats – Jigging
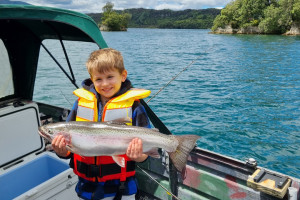
Jigging is a boat-based technique used to target trout in New Zealand’s deeper lakes, where trout often feed on schools of smelt.
Jigging is an increasingly popular and highly effective method of targeting trout from boats on New Zealand’s deeper lakes, particularly in the North Island. When done well, this technique allows anglers to present flies or jigs directly in front of trout.
Guides
What is jigging?
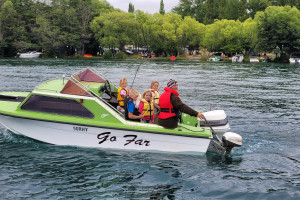
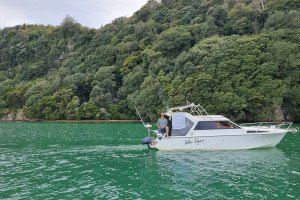
Jigging is a boat-based technique used to target trout in New Zealand’s deeper lakes, particularly North Island lakes such as Taupō, Tarawera, Rotoiti, Rotomā and Ōkataina, where trout often feed on schools of smelt.
Unlike trolling, which is used to search large areas of water, jigging involves anglers identifying and targeting individual trout or schools of fish. A small fly or jig that imitates a baitfish is lowered vertically to the depth where fish are holding and worked with controlled lifts and drops.
A quality fish finder is an important tool for jigging, allowing anglers to locate trout and identify their depth. Once fish are located, the jig can be presented directly to them and worked through the area where they are holding.
Why jigging works
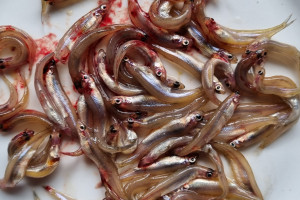
Many North Island lakes support healthy populations of common smelt that form large schools in deeper water. Rainbow trout, in particular, often follow these schools and feed on them throughout the day.
Rather than staying close to shallow margins, trout can suspend in open water, often between 10 and 40 metres deep. Their depth varies with water temperature, oxygen levels and the distribution of baitfish. Once a school of feeding trout is located, they can often be targeted consistently.
Jigging is effective because it allows anglers to present a fly or jig directly at the depth where trout are holding. Keeping the fly or jig in the strike zone for an extended period increases the chance of a trout seeing and taking your offering.
Locating trout when jigging
Successful jigging starts with finding the trout rather than simply choosing a likely-looking area.
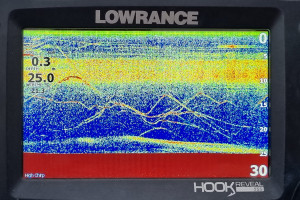
Modern fish finders have transformed jigging, allowing anglers to locate schools of baitfish, identify individual trout, and determine the depth at which fish are holding.
On a fish finder, schools of smelt typically appear as dense clouds or elongated masses. Trout generally appear as larger arches or solid marks above, below, or around the baitfish. Trout will often hold several metres below a smelt school, where they can ambush feeding baitfish.
Choosing the right tackle for jigging
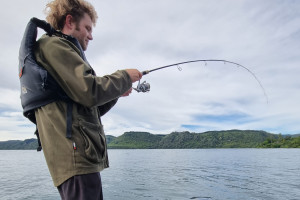
Jigging does not require heavy gear, but specialised equipment makes the technique much easier. A rod between 6 and 7 ft in length with a light to medium action provides enough sensitivity to detect subtle takes while maintaining enough backbone to control larger trout.
A 2000 to 3000-size spinning reel spooled with 6 to 10 lb braided line is ideal. Braid has almost no stretch, making it easier to detect bites at depths exceeding 20 metres. Attach a two to four metre fluorocarbon leader of 6 to 10 lb breaking strain using a reliable braid-to-leader knot.
Double uni knot
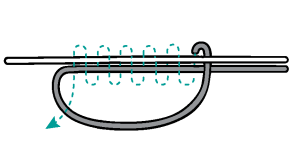
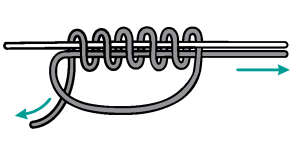
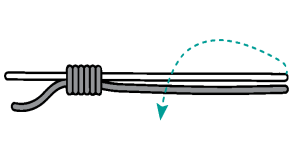
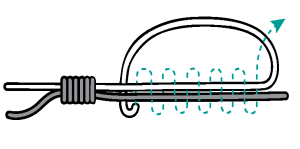
Check out the diagram below for further instruction.
|
|
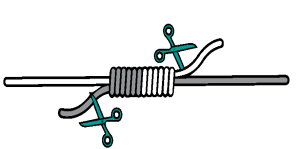
| 1. First loop - Place the two lines side by side and create a loop with the bottom line. Leave a few cm of tag end extending from the loop.. | 2. Wrap - Pass the tag end through the loop and wrap it around both lines at least six times. |
|
|
| 3. Tighten - Pull the tag end to tighten the wraps and form the first knot. Check that the wraps are neat and secure, as shown in the diagram on the above. | 4. Second loop - Using the top line, create a loop around the bottom line, Leave a few cm of tag end extending from the loop. |
|
|
|
| 5. Wrap & tighten - Pass the tag end through the loop and wrap it around both lines at least six times. Pull the tag end to tighten and form the second knot. | 6. Cinch the knots - Lightly wet both knots and the line between them. Hold the main lines and pull in opposite directions so the two knots slide together and tighten. |
|
|
| 7. Trim the tags - Once the knots are firmly
cinched together, trim the excess tag ends close to the finished knot. |
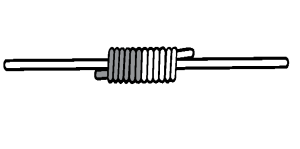
8. Knot complete - Your Double Uni Knot is complete. The finished knot
should look like the diagram above. |
Choosing jigs
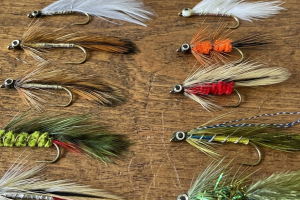
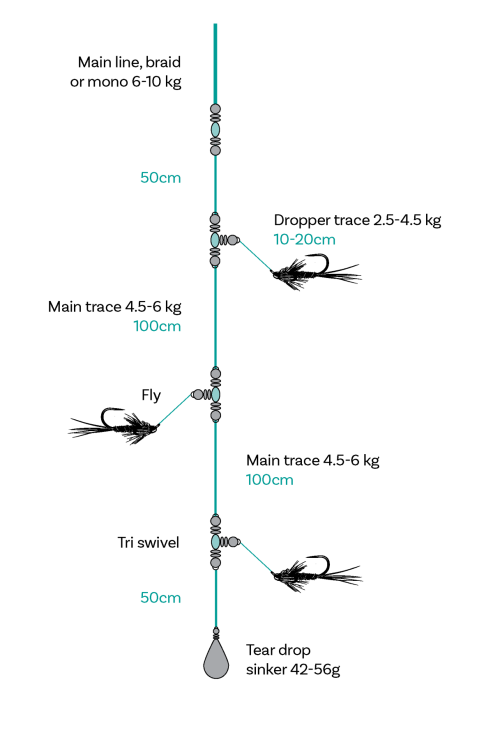
Although metal jigs can catch trout, most anglers use fly-style (feathered lure) jigging rigs.
A typical rig consists of three flies tied above a sinker using short droppers spaced approximately 500 mm apart.
Popular fly patterns include:
- Grey Ghost
- Parsons Glory
- Jack Sprat
- Mrs Simpson
- Hamill's Killer
- Smelt imitations tied with pearl flash and white materials
Fly sizes between #6 and #12 cover most situations. The sinker weight required will depend on depth and wind conditions but in most situations, 1–3 oz teardrop sinkers will work well.
Boat positioning when jigging
Boat control is very important when jigging. The aim is to keep your line and jigging rig as close to vertical as possible and directly beneath the boat, so it remains in the strike zone (the area in which you have spotted fish on your sounder).
Electric trolling motors with GPS anchor functions have made this much easier, allowing anglers to hold their position over fish despite wind or current. If you do not have an electric motor, a drogue can be used to slow the boat’s drift, with regular repositioning needed to stay over the fish.
Keep an eye on the fish finder throughout the session so you know where the trout are holding. As the boat moves, adjust your position rather than continuing to fish an area where the fish are no longer beneath you.
The jigging technique
Once you have located the trout and lowered the rig to the desired depth, begin working the jig with controlled rod movements.
Slowly lift the rod tip by around 30–60 cm, then allow the jig to fall on a controlled slack line. This movement will impart some action into your flies which will imitate an injured or struggling smelt.
When working your jigs, avoid exaggerated or aggressive rod movements. Small, controlled lifts usually produce a more natural presentation and are often more effective.
Pause briefly every few lifts and allow the flies to hang almost motionless. Trout will often strike during the pause or as the jig begins to fall. It can also be effective to wind the rig up several metres before allowing it to sink back through the depth where trout are holding. This change in speed and direction of the jig can trigger following fish to strike.
When working your jigs, keep in mind that trout don't always strike aggressively. Sometimes the line simply stops sinking sooner than expected. Other times you will feel a slight tap or notice extra weight. With braided line, these subtle takes become much easier to detect. The key thing is, whenever anything feels different, just lift the rod smoothly. There is no need for a strong strike, as steady pressure is usually enough to set the hook.
Observing trout behaviour when jigging
One of the advantages of modern sonar when jigging is being able to watch how trout respond to your flies.
It is not uncommon to see trout on the fish finder screen rise from below and follow the rig as it is lifted. This can provide an opportunity to observe their behaviour and adjust your approach if needed.
For example, if a trout follows the rig but loses interest, stop lifting and allow the flies to flutter back down. This change in direction can often trigger a strike. If fish repeatedly follow the rig without taking it, try changing the fly colour, size or pattern, reduce the jigging action, or adjust the sinker weight to give the flies a more natural movement.
Learning to recognise these responses and adjusting your presentation accordingly can quickly improve your success when jigging.