Back to Fishing Knowledge Hub
Preparation of sports fish for the table
Preparing a fish that you have caught yourself and sharing it with friends and family is one of the most rewarding parts of fishing.
To get the most from your catch, it is important to learn how to look after it and learn a few basic fish preparation techniques.
Guides
How to gut a fish
Gutting a fish is a simple but important step in preparing your catch. It helps keep the flesh clean, improves storage life, and prepares the fish for cooking or filleting.
Step 1: Position the fish
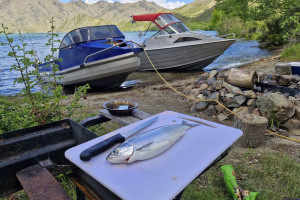
Place the fish on a stable surface. Have the fish on a diagonal with tail end close and head pointing away with the belly facing you.
Step 2: Make the initial cut
Insert the knife into the vent (just in front of the tail on the underside of the fish) and cut forward along the belly toward the head. Take care not to cut too deeply to avoid piercing internal organs.
Step 3: Remove the guts and internal organs
Open the body cavity and gently pull out the internal organs in one motion if possible. Remove everything from the belly cavity, ensuring the fish is fully cleaned out. You will need to do a small cut near the head to be able to remove all the material easily.
Step 4: Remove the gills
Reach up into the head area and pull out the gills. For larger fish, this may require a cut at the base of the gills to make removing them easier.
Step 5: Remove the kidney
Along the inside of the backbone is a dark red strip. This is the kidney. Use your knife to cut down the middle of the kidney, then scrape out the kidney.
Step 6: Rinse the fish
Rinse the inside of the fish thoroughly to remove any remaining blood, scales, or debris. Place the fish on ice or in the fridge as soon as possible. A gutted and cleaned fish is ready for either baking/grilling whole or filleting.
How to fillet a perch
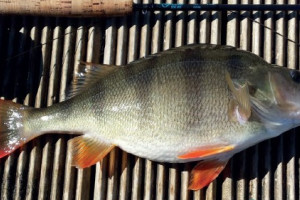
Perch are excellent eating fish, but their tough scales and spiny fins can make them a little trickier to fillet than trout. However, once you get the hang of it, the process becomes much easier.
Step 1: Gut the perch before filleting.
Step 2: Place the perch on its side on a stable cutting board and make a cut behind the gill plate, cutting down to the backbone. Turn the knife and cut along the backbone towards the tail, following the ribs to remove the fillet.
Step 3: Repeat on the other side.
Step 4: Remove the skin on the fillet by placing a flexible filleting knife between the flesh and skin at the tail end. Hold the skin firmly and, keeping the knife flat against the board. Carefully work the blade along the fillet to separate the flesh from the skin.
Step 5: Remove the rib bones by trimming them away with the knife. The cut out the pin bones – you can locate them by running your fingers along the fillet.
As with all food preparation, a sharp knife will make the job much easier. Take your time and use careful, controlled cuts to maximise the amount of meat recovered.
How to fillet a trout or salmon
Trout and salmon are relatively easy to fillet and can be prepared using a standard filleting knife. As with any food preparation, a sharp knife will make the job easier.
Step 1: Place the fish on its side and make a cut just behind the gill plate down to the backbone.
Step 2: Turn the knife so it lies flat against the backbone and carefully cut towards the tail, following the line of the spine. You will have to push through some bones. Continue cutting until the fillet is completely removed.
Step 3: Turn the fish over and repeat the process on the other side.
Step 4: Trim away the remaining rib bones. Pin bones in the fillet can be removed using fish tweezers or pliers if desired. Alternatively, these can be cut out.
Step 5: The skin can either be left on or removed. To remove the skin, place the fillet skin-side down and sliding the knife between the flesh and skin while holding the skin firmly.
Once filleted, trout can be cooked in a variety of ways or frozen for later use.
Looking after your catch
How you handle a fish after it is caught has a major influence on its eating quality. The flesh of the best trout, salmon, or perch can quickly deteriorate if it is not cared for properly. Taking a few simple steps to look after your catch will ensure it remains in top condition for the table.
Step 1 - Consider whether the fish is suitable for harvest
Not every fish is worth harvesting. Before deciding to keep a fish, consider its condition and suitability for the table. Bright, well-conditioned fish are often the best eating. Larger fish are not always better, and in many situations medium-sized trout provide the highest-quality fillets. Thin fish, post-spawning fish, or fish in poor condition are often better released.
Step 2 - Dispatch fish quickly and humanely
If you intend to keep a fish, it should be dispatched as quickly as possible. The most common method is a firm blow to the top of the head immediately behind the eyes.
Step 3 - Bleed and gut the fish promptly
Once dispatched, bleed the fish by cutting around the gills. This allows blood to drain from the flesh, which can improve both the appearance and eating quality of the fish. Follow up by removing the gills and gutting the fish soon as this also helps preserve flesh quality.
Step 4 - Keep harvested fish cool
Ideally, harvested fish should be placed on ice (in a chilly bin/bag) as soon as it is harvested, particularly during warm weather. If ice is not available, keep the fish shaded and out of direct sunlight. Fish left lying in the sun, on a hot riverbank, or in the back of a vehicle deteriorates rapidly.
Step 5 - Prepare fish as soon as practical
Once home, fish should either be:
Filleted and refrigerated for use in the next 2-3 days or frozen for later use. Ideally, all fish should be eaten when fresh.